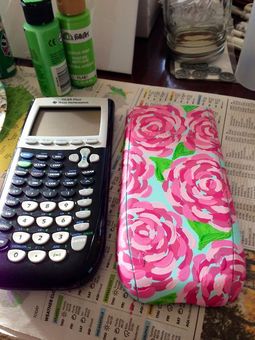
I was a little bored this afternoon so I was scrolling through my sisters Pinterest board and came upon this photo so I decided to try it on my boring black calculator. The whole process took about two hours but the time flew by. Here are my instructions on how to do it yourself-
Materials: You'll need a light blue, white, dark pink, and green acrylic paint, small paintbrushes, and a clear paint gloss finish for when you're done.
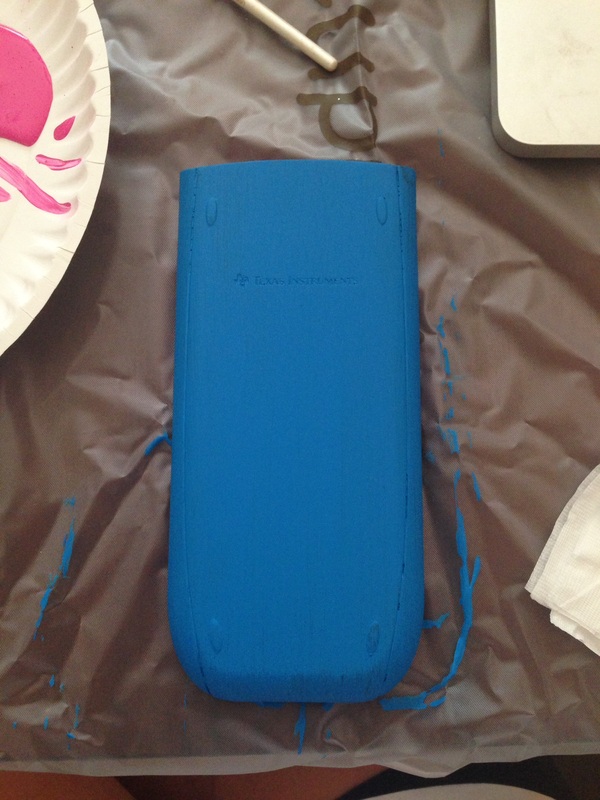
Step 1. I painted the whole back of the calculator cover with a "light blue" acrylic paint. The light blue ended up being pretty dark so after I was done with all the flowers I went back with a lighter blue and covered it up and it ended up looking a lot better. It took about two coats to cover the black up completely but didn't take long because I used a hair dryer in-between coats to speed up the drying process.
Materials: You'll need a light blue, white, dark pink, and green acrylic paint, small paintbrushes, and a clear paint gloss finish for when you're done.
Step 1. I painted the whole back of the calculator cover with a "light blue" acrylic paint. The light blue ended up being pretty dark so after I was done with all the flowers I went back with a lighter blue and covered it up and it ended up looking a lot better. It took about two coats to cover the black up completely but didn't take long because I used a hair dryer in-between coats to speed up the drying process.
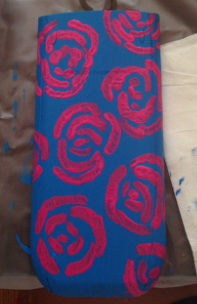
Step 2. In this step you draw the outline of the pink flowers with the darkest pink you have. I only had one shade of pink paint so when I needed lighter colors I just mixed in white paint accordingly. I was worried that I might shape the flowers the wrong way but as I kept painting I realized there really is no wrong way to do these. Just make sure you leave some space for the lighter shades of pink coming next!
Step 3. In this step, you need to use a light pink and fill in almost all the spaced in-between the dark pink lines. make sure to leave some blue showing for the medium pink! I overlapped the light pink over the dark pink every now and then to add some texture.
Step 4. I forgot to take a picture of this step before I started step 5, but in this step you will use your medium shade pink to fill in the remaining blue spaces.
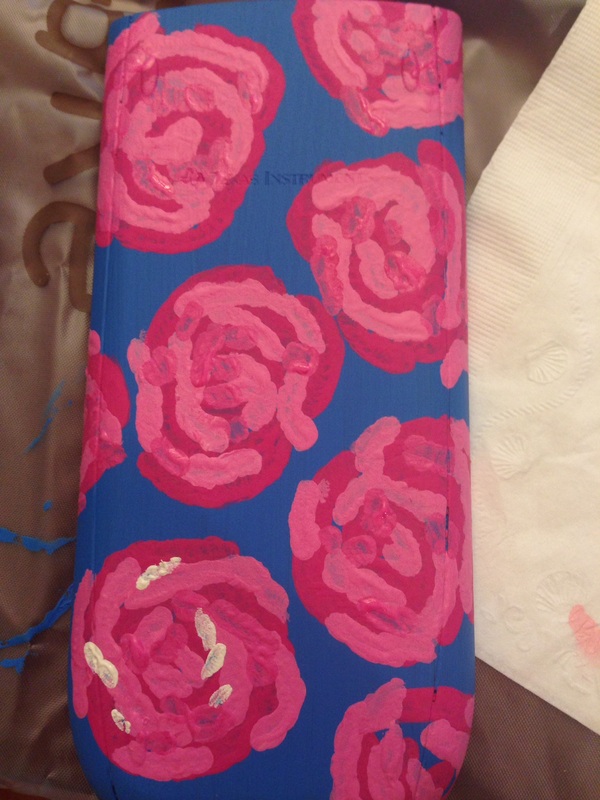
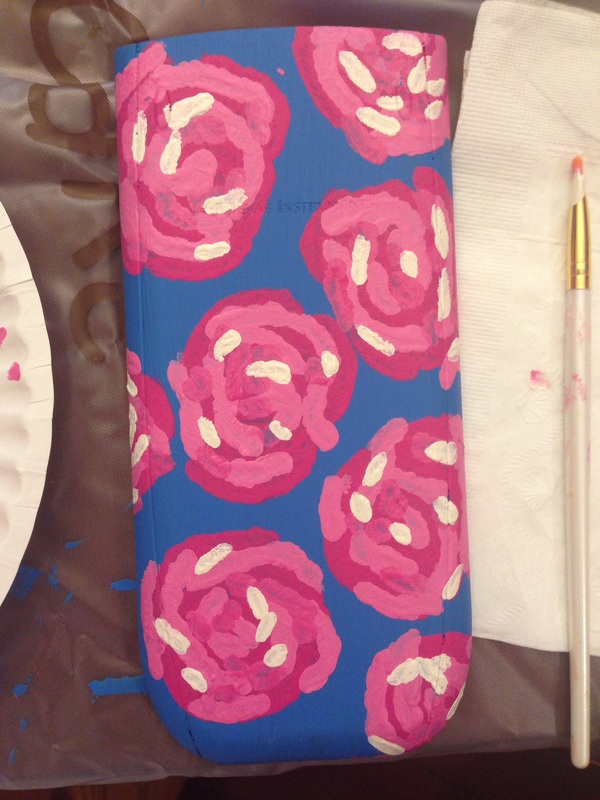
Step 5. With your white paint, make little small dots or lines around the flower where you may still be able to see some blue. Don't do too many you only need about 3-5 per flower.
Step 6. This will probably be one of your final steps unless you used too dark or too light of a blue like I did. In this step, you will need a light green paint to paint the leaves. They're not hard to draw, so just go with it.
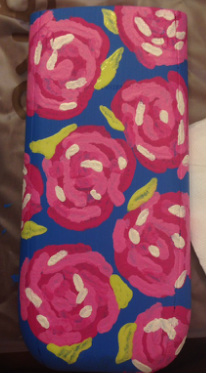
Step 7. I told y'all I messed up and used a way too dark blue for my base so in this step I used a small paintbrush and went in-between my flowers with a lighter blue.
Step 8. Once I was all finished and my paint was all dried I used Krylon "Make it Last!" clear sealer to top off and coat the cover just to make sure the paint stays.
Step 8. Once I was all finished and my paint was all dried I used Krylon "Make it Last!" clear sealer to top off and coat the cover just to make sure the paint stays.
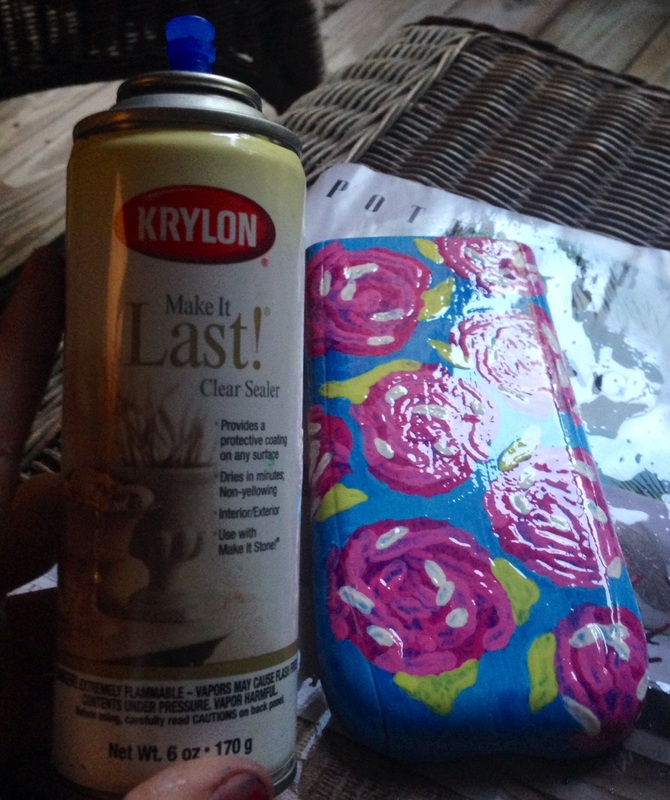
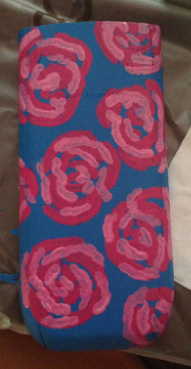
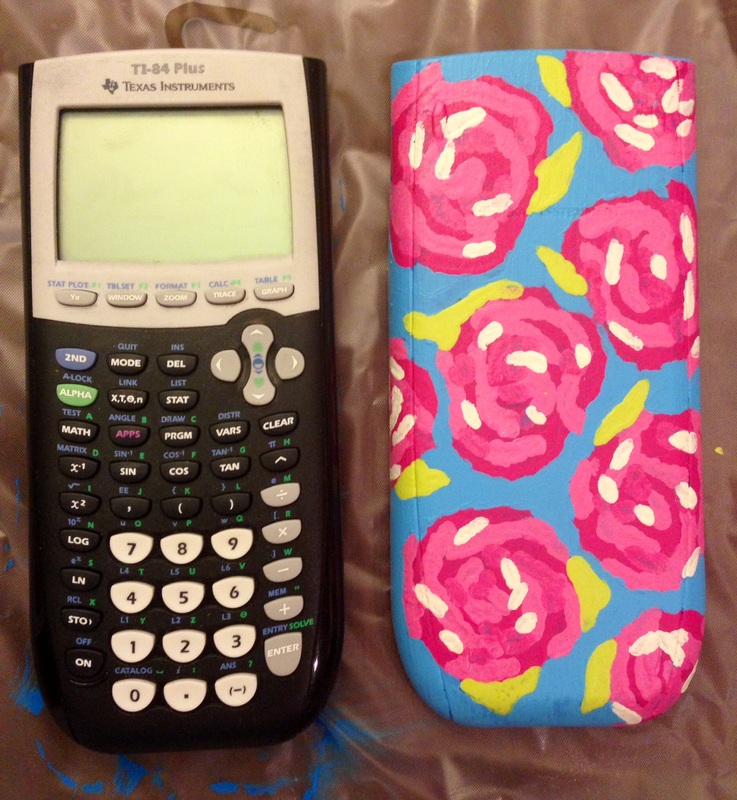
Heres my finished product! I hope y'all enjoy!
xoxo Em
xoxo Em
 RSS Feed